About This Recipe
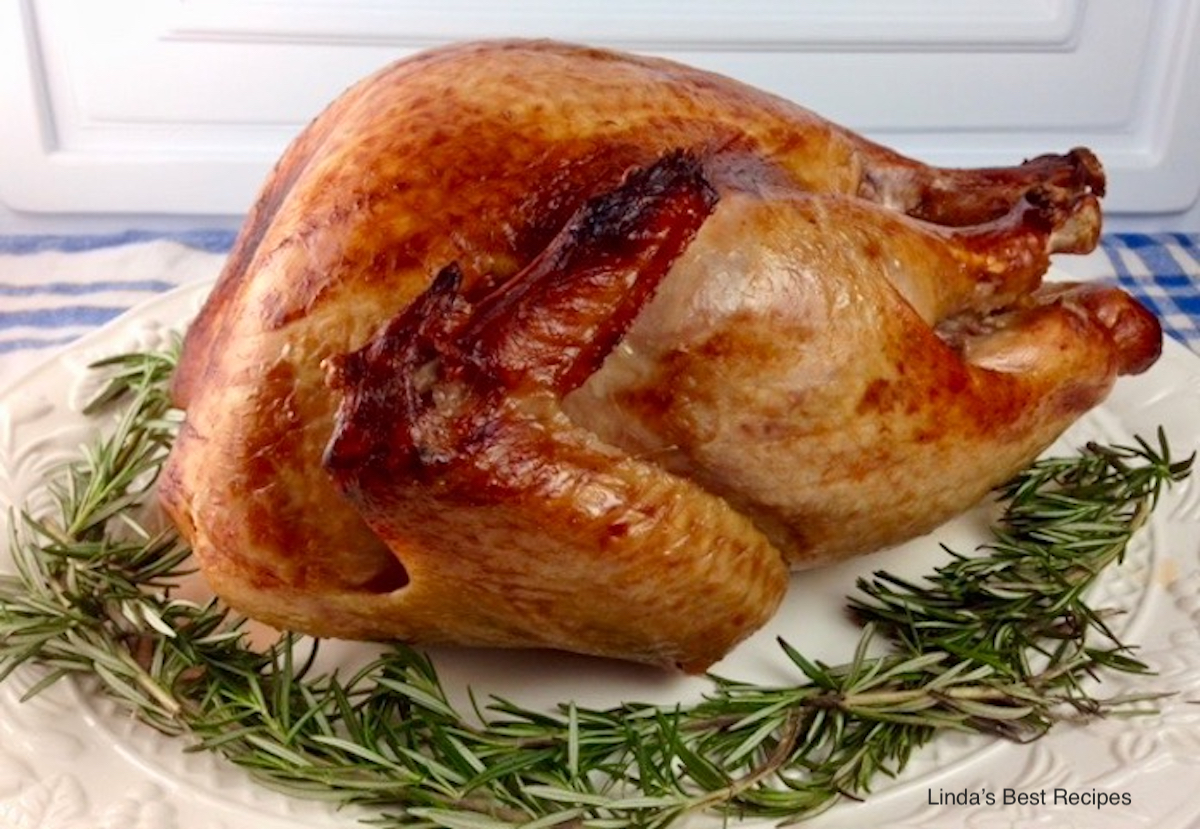
Thanksgiving is a very personal holiday for Americans. We all have traditional recipes we serve on this day. And family recipes that have been passed down through the generations are important to everyone. This recipe for Maple Butter Glazed Turkey, however, isn’t one of them.
What if you don’t have cherished recipes? What if your family always went out to dinner on Thanksgiving? You can search the web for ideas. But I have the recipe for the best Thanksgiving turkey; Maple Butter Glazed Turkey.
Ideally, the best Thanksgiving turkey should be moist and tender, with a crisp bronzed skin and juicy, flavorful meat. Handling this big bird can take some experience and practice.
The secret to the best turkey is in the preparation, cooking, and basting. Let’s work backward on all of these steps.
Poultry should always be cooked to 165°F for food safety reasons, of course. But many times Thanksgiving turkeys are overcooked just because the cook is afraid of serving an undercooked bird. Follow timing and cooking instructions carefully and use a reliable and accurate food thermometer to avoid that issue.
Basting a turkey can make the skin brown and crisp, and it adds flavor to the bird. Turkey should be basted no less than six times during the roasting process. That’s not a scientific number; it’s just the number I use.
Brine it!
But there’s really no way to get flavor inside the turkey other than brining. And have you tried brining a turkey in a liquid solution? I don’t think there are many refrigerators big enough to hold a 14 pound turkey in a pot with all that liquid. And if there were, just the mechanics of hauling around that pot, which can weigh 50 to 70 pounds, are overwhelming.
So dry brine your turkey. Make sure that when you buy the turkey it has not been injected with any solutions and hasn’t been treated with salt, sugar, or seasonings. Buy a fresh turkey from a co-op or order it specially from your butcher. Then make my dry brine, rub it into the turkey skin and flesh and inside the cavity. Let the turkey stand in the fridge for one to three days. Then roast (and baste) to crisp and juicy perfection.
Note: If you can’t find maple sugar, you can use brown sugar instead. If you can’t find maple butter, just use another 2 tablespoons regular butter. But be sure to use only real maple syrup for the basting liquid.
Enjoy this wonderful recipe for Maple Butter Glazed Turkey. And Happy Thanksgiving!
Why this recipe for Maple Butter Glazed Turkey works:
- The dry brine produces a crisper skin because it draws more moisture out of the skin. Water hinders browning. Pat the turkey dry with paper towel before you put it in the oven.
- And the dry brine is more safe from a food poisoning standpoint. Face it, most turkeys do carry pathogenic bacteria such as Salmonella. Plumping the turkey into a huge vat of brine water is just asking for your kitchen to be contaminated.
- NEVER EVER rinse a turkey before you start preparing it. Bacteria on the skin will aerosolize around your kitchen under the water stream, contaminating your sink, the counter – and YOU. The only thing that kills Salmonella, Campylobacter, Listeria monocytogenes, and E. coli bacteria is heat, i.e. cooking to that safe temperature.
- An unstuffed turkey is safer to eat, since it’s difficult to get the center of the stuffing to reach 165°F, especially if you are cooking a very large turkey. Cook the stuffing (now called dressing), in a slow cooker or in a casserole.
- Remember that the turkey needs to stand for 15-20 minutes before it’s carved so the juices can redistribute.
- And after the bird has been out of the oven for 2 hours, it has to go back into the fridge to avoid possible food poisoning. No matter what. It’s easiest to break down the turkey at this point, put it into a clean pan, cover with foil, and refrigerate up to 4 days. After that, you must freeze the turkey or discard it.
Steps
|
1
Done
|
Do not rinse the turkey. This will just spray bacteria around your kitchen. Remove the giblets and neck and store, covered, in the fridge. Just pat the turkey dry with paper towels. Put the turkey in a large roasting pan. |
|
2
Done
|
In a small bowl, combine the kosher salt, maple sugar, pepper, and marjoram leaves and mix well. |
|
3
Done
|
Loosen the skin from the turkey as best you can, being careful not to tear it. Rub the salt mixture into the turkey under the skin, in the cavity, and on the skin. Use all of the rub. |
|
4
Done
|
Put the turkey in the refrigerator. Cover it with an overturned pot. You want air circulating around the turkey, but leaving it completely uncovered presents a food safety hazard. If you don't have a pot large enough, cover the turkey loosely with heavy duty foil, making sure there is air space underneath the foil. |
|
5
Done
|
Keep the turkey in the refrigerator for 1 to 3 days. |
|
6
Done
|
When you are ready to roast the turkey, pat it dry with paper towels. Preheat the oven to 325°F. |
|
7
Done
|
In a small saucepan, combine the maple syrup, maple butter, butter, and chicken broth and bring just to a simmer. Pour this mixture over the turkey. |
|
8
Done
|
Roast the unstuffed turkey for 13 minutes per pound. For a 14 pound bird, that would be a little over 3 hours. Roast a stuffed turkey for 17 minutes per pound. If you'd like, insert an oven-safe leave-in thermometer into the turkey before you start roasting it. |
|
9
Done
|
Baste the turkey as it cooks, about every half hour. This may increase the roasting time a bit, because the oven will lose temperature every time you open the door. |
|
10
Done
|
When the turkey has reached 165°F, take it out of the oven. Cover the turkey with foil and let stand for 20 to 30 minutes before carving. Then enjoy every luscious bite. |
